> For the complete documentation index, see [llms.txt](https://docs.cronos-pos.org/llms.txt). Markdown versions of documentation pages are available by appending `.md` to page URLs; this page is available as [Markdown](https://docs.cronos-pos.org/cronos-pos-chain-protocol/chain-details/solo-machine.md).
# Create the IBC-enabled tokens on the Cronos POS Chain with Solo Machine
A solo machine is a standalone process that can interact with blockchains through the Inter-Blockchain Communication Protocol (IBC). It can store key information like signed messages and private keys but has no consensus algorithm of its own. The solo machine client can be seen as a verification algorithm capable of authenticating messages sent from a chain or solo machine. With solo machines, one can access the IBC transport layer and blockchains (including features built on them) within the Cosmos ecosystem without developing their own blockchain. This provides great ease to token issuers who would like to natively mint IBC-enabled tokens.
Another feature of using a solo machine is that it can [leverage Interchain Accounts (ICA)](https://github.com/cosmos/ibc-go/tree/main/modules/apps/27-interchain-accounts). The key feature of the Interchain Accounts module is that it enables cross-chain account management via the IBC, which allows one blockchain to access the features of another blockchain. On the Cronos POS Chain, we have leveraged solo machines to issue tokens like [Polkadot (DOT)-pegged coins](https://medium.com/crypto-org-chain/crypto-org-chain-issues-dot-token-via-ibc-solo-machine-b0f58e605b0e). These DOT tokens can be natively transferred within the Cosmos interchain ecosystem using IBC.
Solo machines open up plenty of use cases in the Cosmos ecosystem. In this article, we will review simple approaches to implementing token operations using the IBC solo machine (e.g. mint and burn as well as delegation and undelegation) on the Cronos POS Chain locally, while any Cosmos SDK based blockchains should support it. Developers and users who are interested can clone our [Stag repository](https://github.com/devashishdxt/stag) to quickly go through these steps and try the approaches out.
## Prerequisite: Blockchain Configuration
The blockchain is running locally in this example and the proper configuration setup is required. In the genesis file, ensure 1) `transfer` in the genesis file is enabled (`receive_enabled: true` and `send_enabled: true`); 2) the staking message (`/cosmos.staking.v1beta1/MsgDelegate` and `/cosmos.staking.v1beta1/MsgUndelegate`)is enabled at `allow_message` under `host_genesis_state`. This lets them communicate properly later on.
After completing the integration, run the chain in the background.
## Signer Configuration
Firstly, you need to install Rust to be able to conduct the operation with stag. The prerequisites setup guide is available [here](https://github.com/devashishdxt/stag/blob/main/README.md#installing) and the Stag CLI guide is available [here](https://github.com/devashishdxt/stag/blob/main/stag-cli/README.md). After installing Rust, you need to configure signers for your preferred chains. The sample config for a signer is included in `signer.yaml` by `stag signer sample-config`, where you can set up your own signer and update its details accordingly.
## Add a Blockchain and Create an IBC Channel
The next step is to add the chain to the solo machine. To run IBC operations on-chain, `stag` needs several basic configurations to be set up for that specific chain. You can tailor the `trusted_height` and `trusted_hash` to your chain's own trusted height and trusted hash using `stag core add-chain `.
A sample `chain.yaml` is shown here:
Now, you can establish an IBC connection with a blockchain using
```
$ stag core connect
```
(`chain-main-1` is the `chain_id` in our example here)
And create an IBC channel with a chain using
```
$ stag core channel create .
```
There are two options for `channel_type`: `transfer` or `ica`. In the example below, the transfer channel is created, which looks like:
#### Use Case #1: Mint and Burn Tokens
A solo machine can be used to mint and burn tokens on any IBC chain. To mint and burn tokens on-chain using a solo machine, simply run
```
$ stag transfer mint .
```
We will mint 1,000 GLD tokens as an example, allowing us to perform the
```
$ stag transfer mint chain-main-1 1000 gld
```
operation. If you would like to check your current token balance, you can do so by executing
```
$ stag query balance --ibc-denom
```
In our example, we perform token minting with
```
$ stag transfer mint chain-main-1 1000 gld
```
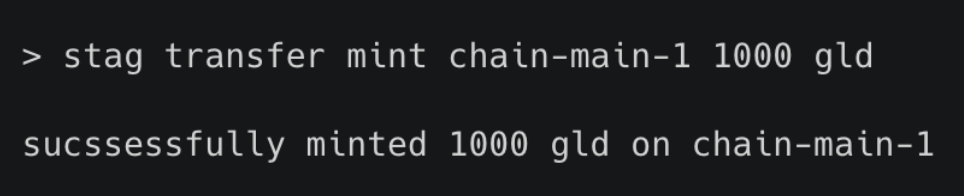
In return, the response should look like this:
The same token can be burned with the query
```
$ stag transfer burn
```
#### Use Case #2: Delegation and Undelegation
Before delegating tokens from your interchain account to a validator, ensure that you have enough tokens in your account, which allows delegation to be executed successfully. If you would like to send tokens from one interchain account to another, you can do so with
```
$ stag ica bank send .
```
Delegation and undelegation can be done with
```
$ stag ica staking delegate
$ stag ica staking undelegate
```
In our example, we perform delegation using
```
$ stag ica staking delegate chain-main-1 tcro17jw7dzu9... 1000 basetcro
```
Similarly, we can undelegate with
```
$ stag ica staking undelegate chain-main-1 tcro17jw7dzu9... 1000 basetcro
```
### Solo Machine UI
Apart from Stag CLI, you can perform the same execution through a UI (User Interface). With the [Stag repository](https://github.com/devashishdxt/stag), you can simply run `just serve-ui` under the path of `../stag-ui`. Ensure that you have the [required target for Rustup setups](https://rustwasm.github.io/docs/wasm-pack/prerequisites/non-rustup-setups.html), which can be installed by `rustup target add wasm32-unknown-unknown`.
Once it is connected, the default server listening is at `http://127.0.0.1:8080` and the frontend should look like:
Like what we did with CLI, we first need to configure the signers, chains, and connections before building the channels.
Here’s how minting and burning tokens look like:
This is how delegating and undelegating will appear: